Everything You Need to Know to Install Baseboard Heater Covers You Learned in Middle School Science Class

Go with us for a moment back to middle school science class . . .
Remember when your teacher told you that an experiment that tested only one variable at a time would reveal just how much a single change could affect the result?

Case in point: this freshly painted and re-floored room went from “nice” to “wow!” because of a single change. That change? The addition of a Baseboarders® baseboard cover.
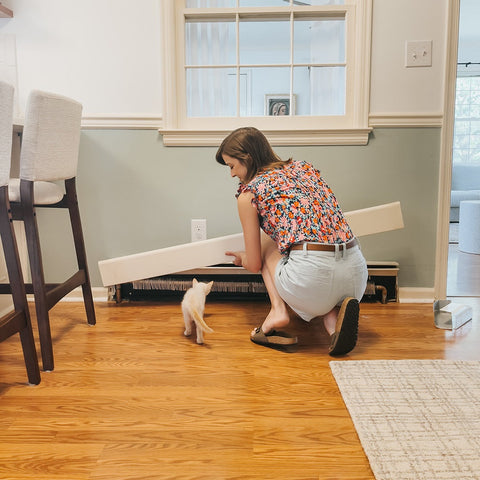
Now what if we told you that the moment your new baseboard heater covers arrive, to the moment you stand back and admire a job well done can be as little as two minutes? We’re serious. No science class required. Your kids could probably do it.
How to Install Baseboard Heater Covers in 2 Minutes
All Baseboarders® products were designed to be super simple to install. All you have to do is remove most of the old components and place the new ones right over the top. You don’t even need tools (if you’ve ordered the right sizes).
- Remove end caps from your old heater covers
- Remove the front plate from your old covers
- Fit your new Baseboarders® covers right over the old unit without even having to take off the back plate, mess with cutting screws, etc.
It might take you a little longer than 2 minutes if
- You have no backplate
- Your fins need a cleaning
- The previous covers had a bad paint job
- You have caulk buildup
- You want to get rid of the back plate
Here’s what to do in case you run into one of these scenarios.
You have no backplate . . .
No problem! Order some wall brackets and attach them in the appropriate place above your heating element. With these installed, you won’t have to worry about a backplate. The new covers will attach right to the brackets.
Your fins need cleaning . . .
You’ll see the “fins” once you take the faceplate off your baseboard heater. They are the wafer-like metal squares situated around the hot water pipe in your heating unit. Dirty fins decrease heating efficiency. Simply give them a vacuum. It might also help to have a can of compressed air to blow out any spots that aren’t coming clean with the vacuum. If you find any bent fins, feel free to straighten them out with some pliers.
The previous covers were painted . . .
If your old covers were painted, especially if they were painted as a whole instead of separate components, it may be difficult to remove them. As long as you don’t want to save them and you don’t damage the heating element or the wall, a little extra force may do the trick. If you feel you need to be a bit more careful, use a utility knife to cut the paint that’s sealing pieces together. Always take proper precautions when using a utility knife, including gloves and safety goggles.
You have caulk buildup . . .
Similar to paint, if your old components are glued to the wall or to each other due to some caulk, a little extra force may be all it takes to pry them loose. However, you don’t want to damage the wall or the heating components so use a utility knife to carefully cut away the old caulk. Always take proper precautions when using a utility knife, including gloves and safety goggles.
You want to get rid of the back plate . . .
This will add considerable time to your job. The back plate is secured into wall studs and reversing that is difficult. Most opt to cut the screws holding the back plate to the wall. Use a reciprocating saw to cut the back plate from the wall. Remove carefully so as not to damage the heating element. Next install wall brackets then place your new covers on the brackets.
Whether you can replace your baseboard heater covers in two minutes, or you have to put a little extra TLC into the job, Baseboarders® offers you the fastest, and most attractive way to install baseboard heater covers and give your space the update it needs.
